Monday, November 28, 2011

Working Holiday

Well, OK, maybe not so much "working" holiday as "playing" holiday, or "hobbying" holiday, or something like that.  Point being, we did work off at least a little bit of the turkey we ingested over the 4 day weekend...although sadly none of the pumpkin cake, stack cake, caramel cake, or 2 varieties of cheesecake, I'm sure!!

For Thanksgiving Hubs, Sweet Pea, the Little Dude and I headed up to my Mom's house in southwest Virginia, as we do every year.  My whole family -- on Mom's side at least -- lives there within about a 45 minute radius of one another, so it's always up to us to do the holiday traveling.  Not that I mind too much, though, because while I may have lived in Georgia for the last 10 years, it's still the place that I consider "home".

Home Sweet Home
NOTE:  This image from the former High Knob Observation Tower was sourced from the Spearhead Trails Initiative -- a local group that is working to expand availability and use of multi-purpose trails in the southwest Virginia area.  My aunt does a lot of work for this great cause!!!

It's just under an 8 hour drive from here to yonder, and Hubs had to work a full day on Wednesday, so we rolled into Mom's somewhere around 1am. Not too shabby considering our usual arrival is an hour or two later...and let's not talk about the fact that children who are sooooo excited to be there, and who have slept a considerable time in the car, are always wayyyyyy too keyed up to actually let Hubs and me go to or stay asleep!

So anyway, we grabbed a little rest, and while we did manage to talk a lot of shop, Thursday pretty much consisted of: cook, eat, cleanup, chat, eat, cleanup, watch a movie, eat, cleanup.  For us girls, at least. Hubs and Mom's Hubs squeezed in quite a bit of garage time, where they tend to disappear for the better part of any visit.  Plus, since the last time we were there Mom & Her Hubs have purchased a log splitter, so the menfolk could hardly be expected to contain themselves inside -- including the Little Dude.


He was taking his job VERY seriously.  He almost cracked a grin when I gave him a thumbs-up, but he quickly got his "man-face" back on.


I can assure you that the safety features of this machine were reviewed and approved by myself and four other adults before he was allowed to operate that lever, and my grandfather was poised by the emergency shut off switch the whole time.  So please, no diatribes on our egregious lack of concern for our son's safety.  (Besides, the in-laws took care of that already, thankyouverymuch!!)

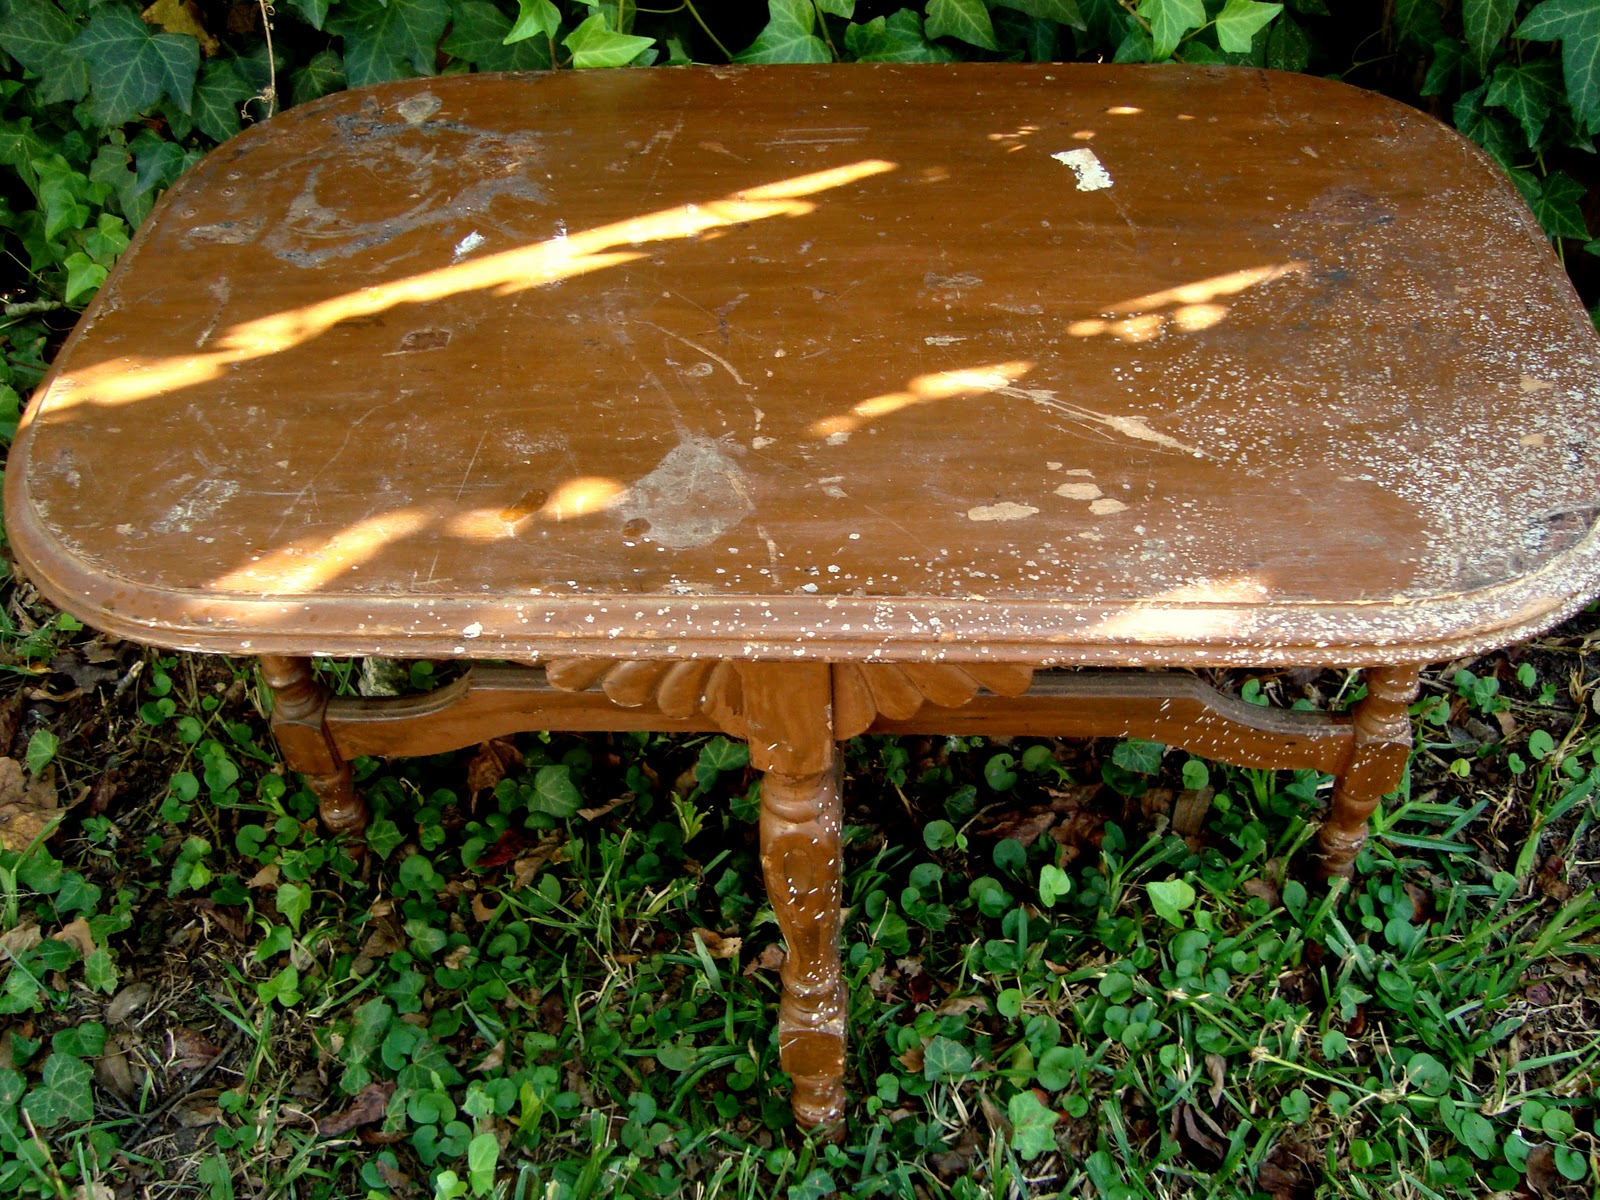
The next day, while every other (in)sane person was hitting the Black Friday sales, Mom and I decided to tackle this beast:


She bought this dresser way cheap from a local hoarder, with the intent of using it as a media cabinet underneath her tv.  She and Her Hubs had already removed the damaged top, and hope to replace it with reclaimed wood.  They'll also be replacing the trim on the bottom, which is grody press wood, but for now we left it on and painted it.  The sides are that formica-y stuff.  The rest is wood, and we both love the original hardware (keyholes! squeal!!) and the grain on the drawers.  So, we decided to paint the frame to let the drawers stand out more.

I suspected there might be some painterly goodness happening this weekend, so fortunately I'd brought my trusty plaster of paris.  After mixing some moss green and blue green paint leftover from various parts of the house with a little blue and black acrylic paint and of course the plaster of paris, we wound up with a pretty gray/green color that coordinates great with her tile floor and rug.  Once we had it all painted, we distressed and applied dark wax. 

Here's the not-quite-finished product (top & trim still need to be replaced; I suggested she fine sand the drawers a little more; hardware to be put back on; and of course, all the drawers should be put back in -- the bottoms were just too full of ancient VHS tapes for me to have any desire to lift 'em back in for the photo shoot!!):


Ummmm, the newly painted formica-y sides looked the best of all, so why don't I have a shot of those??!?

After we not-quite-finished her dresser, we packed up the brood (me, Mom, my kids, and my 10 yr old stepsister, whom I love to pieces and will henceforth call Cowgirl for blogging purposes) and headed to my bestie Holli's house.  We were fully expecting to engage in some kind of project since she is kinda the queen of crafty among my circle of friends, and she did not disappoint.  We wound up painting her laminate coffee table with my POP mixture in a gorgeous, perfect barn red that we were hella-lucky enough to pluck right off the oops shelf of the local big box discount store.  We gave it 2 allover coats, and she's gonna go back and spray the top in chalkboard paint.  No pics because we were in a major time crunch (movie date with The Muppets!), so I'm counting on her to at least cough up some good afters once it's all done!!

Saturday was Flea Market day with Mom...and no kids this time!  It was a little windy and only a few sellers were out, but we did come away with a couple of goodies, including a solid wood, two-tier magazine rack for $2!  It's still at her house waiting for me to give it a starring role in a future blog post.  We also hit up the new Habitat ReStore and came away with quite a haul, including lots of vintage Christmas decor and some things Mom needed to organize her mail (also a huge problem at my house, hopefully to be resolved soon'ish!).

Saturday afternoon and evening were for hanging with family and taking kids to the fabulous Bristol Motor Speedway for some thrills on the "Chill Hill".

NOTE: Chill Hill image sourced from BristolMotorSpeedway.com and in no way represents my actual family or the extreme degree of awesomeness of this contraption.

What's the Chill Hill you might ask?  Basically .... Giant county fair-type slide. Covered entirely in commercial-type plastic dishwashing mat type things. Small children, adults, and all ages in between flying down it on innertubes with a hard plastic? silicone? covered bottom sprayed with mystery slippery-solution. Total awesomeness...especially for those of us who miss all the fun of snow but not the actual, you know, SNOW of snow.


On Sunday morning, knowing our time was rapidly dwindling, we got right to work on Mom's mail organizers.  I tried to make our dresser paint more green to better coordinate with her kitchen, but with a limited supply of paint (too bad we didn't have my GA stock at hand!) and no time or desire to go out and buy some, we wound up sticking quite close to the original gray-green.  Some dark walnut stain followed by dark wax helped improve the color, although it of course looks all washed out in my hastily-propped-in-front-of-the-window-because-Hubs-is-loading-the-car-for-departure-even-as-we-speak photos:


What's that you say?  Why yes, the top photo really would have looked better with the tape removed but what can I say, it's really a wonder I wasn't trying to take those shots on zoom as we were backing out the driveway!  Mom's going to cover the original green chalkboard with black chalkboard paint.  I also think it's cool that she did the paper towel holder (bottom photo) all by herself and in my opinion it looks the best of the three!  She claims I'm the "expert" on painting furniture, but I never cease to be amazed by the fact that she can do ANYthing!  I'm hoping that the next few times we visit I can remember to snap shots of some of the coolness she's accomplished at her house -- before my young'uns and our being too busy eaking every last smidgen of fun out of a visit trash the place beyond photo-worthiness.

Oh, and here's a lil snappy of something the guys might typically be disappearing to the garage to work on:


 If Hubs were still awake, I'd give ya all the deets on this machine.  All I can tell you is that it's a vintage...probably late 60's...SkiDoo.  Er, that's a snowmobile for those who might not know :) Hubs loves 'em the same way I love faded old flower sheets and chippy layers of painted wood.  I'm pretty sure we're the only people who live in Savannah, GA -- where I've seen it flurry 3 times in 10 years -- who have snowmobiles in our garage.

And ya know, I gotta give credit to Hubs & Mom's Hubs -- I might occasionally emit just a little smidge of snark about the time they spend in the garage, but they sure do some darn good work down there. Believe me, these machines look nothing like this when Hubs drags 'em home, and their transformation on the "Mountain Doo" (as I just christened this one, since it has been gifted to Mom's Hubs who lives in the mountains and drinks Mountain Dew -- haha, I kill me!) is pretty dang impressive.  If we're really lucky, maybe Jethro's Garage might even grace us with some before shots and such if he happens to chance by here!

Wednesday, November 9, 2011

Fall Pinterest Challenge

So, a couple of weeks ago when YHL and Bower Power announced the Fall Pinterest Challenge, I got all kinds of excited. 

Because like, oh, pretty much everybody, I’ve found that I’m really great at pinning, but notsomuch at doing.  Heck, who am I kidding -- even before Pinterest and pinning, I was really great at bookmarking…not so great at doing! 
So anyway, what to do, what do do??  Much like Sherry, I settled on a Christmas-related project.  Christmas is the one holiday I go a teensy weensy bit overboard with, plus we all know what a whirlwind November and December are, so I felt like it was a good chance to get a head start on preparations.
 My first thought was stamped clay gift tags I'd pinned from Come on, Ilene!
Image from Come On, Ilene! (obviously!)
I love creating custom tags when wrapping Christmas gifts, and felt ready to branch out from my usual stamped / paper-embellished creations.  Plus, I wanted some experience with stamping clay because visions of jewelry and buttons are dancing in my head…
Here’s what I came up with:

My favorites of the bunch. Ignore my uneven rolling, please, thankyouverymuch!

Last time I made a big Michael’s run (and thankfully for my wallet, that was some time ago), I wanted to pick up some white Model Magic “for the kids,” but could only find it in the big, expensive, multi-color packs.  So I brought home this instead:
It’s messy and a little hard to work with, and I couldn’t find the play-doh rolling pin or large circular cutting tool I wanted to use so I had to make do with other tools at my disposal, but I’m pretty ok with how this first run turned out.   I like the simplicity of the white clay, but some of those detailed initial stamps are crying out for paint and glaze.  And that’s where I hit a huge mental block.  Because for some reason, I just don’t feel “moved” to bust out the paint and glaze for these tiny little tags just yet.  Go fig?!  I’ll get there, though – hopefully I’ll get my mojo back once I get my Christmas stamps down from the attic this coming weekend!
The best part of the whole process was having a chance to use one of these:
OK, OK, so if you look closely you'll note that it was actually the "G" that I stamped on the clay.  I just couldn't find the "G" at picture taking time.  Just roll with it, mmmkay?
I picked up a big box of printers blocks at a yard sale for $10 over the summer, and my heart sings every time I look them, much less find a use for them!
So then, having WON my own personal Pinterest Challenge (because clearly, 1 almost-but-maybe-not-quite-completed project down and 1,000 to go is totally winning), I was on a roll!  What else could I knock off my Pinterest /Bookmark list (since I’m technically still migrating bookmarks to Pinterest)???
Well, during that same wallet-busting trip to Michael’s, I had also picked up some tubes of Rub n Buff in Silver Leaf, Grecian Gold, and Patina.  Right around that time I had seen a bunch of bloggers go wild about the stuff, and I really liked the look they were accomplishing with it.  Here’s one of my bookmarks that made the Pin transition -- Better After's Rub n Buffed Mirror:

Image from Better After

So I decided that (finally) trying out my Rub n Buff would be an easy way to knock out two pins with one challenge…sweet! 
First victim  recipient – cute beaded Christmas star that I picked up a good while back and planned to give to my Mom, who is SADLY lacking in the tree-topper department.  Every year I keep hoping to miraculously stumble across another kick-a$$ copper star tree topper like the one I bought at First Friday on the River our first married Christmas together, and sadly, that never happens.  (I suppose a really great daughter would just give mom her star, because it would go so great with her decor…unfortunately for Mom I guess I’ll just qualify as a barely adequate daughter because I am not about to part with it! Haha! Love you, Mom!!!)
Anyway, I totally fell for the star, but wasn’t so crazy about the brown discoloration on some of the beads.  Turns out the wire backing had rusted in a few spots and stained the beads. 


But a little silver Rub n Buff to the rescue and Voila!!


No more rust spots!!!
For Mom’s fairly rustic décor, I like the fact that the RnB toned down the sparkle a tad.  I used a toothbrush to get in all the crevices, and I was very impressed with the coverage.  It took a crazy-tiny amount to cover the star, and it was like magic the way it covered the tacky looking clear bead in the center. I hope she likes it – I plan to take her a big bag o’ Christmas stuff when we visit for Thanksgiving, since we traditionally decorate her tree that weekend, and in my opinion she just doesn’t have enough ornaments to satisfactorily fill her big honkin’ tree!
And then, anyone who’s tried Rub n’ Buff knows what happened next.  I caught the fever.  I ran around my house like a crazy woman, looking for stuff to Rub n’ Buff.  So far I’ve “only” managed to hit a brown hobnail votive and flameless candle with the Grecian Gold, and a vintage painted white mirror in our guest room with Patina…but I assure you, I am only just beginning.  Also, I just have to note, it’s freakin’ unbelievable the magic that Gold RnB worked on an ugly white plastic flameless votive from Dollar Tree! 

Too bad the battery of course died on me right after that, haha!  But that’s ok…I still have 3 practically full tubes of magic remaining…and I’m already plotting which colors to buy next!
So how about y’all?  Did anyone else take on the Pinterest Challenge?  If you did, please comment and let me know what # your link is…because as much as I love trolling linkys for more ideas to pin (!), I think they’re up to nearly 800 links at this point, and that’s too much linky awesomeness even for me to go through!

PS -- UPDATE -- because I am such a procrastinator, I sadly did not get my blog post finalized in time to make the deadline for the Pinterest Challenge linky party.  I guess Sherry and Katie will have to content themselves with their "measly" 800+ entries, haha!  I'm just glad for the kick in the butt I needed to cross a couple of things off my list, for sure!!

Saturday, November 5, 2011

Impromptu Fall Photo Shoot

Today was an absolutely gorgeous fall day, full of sunshine and high temps around 70, so the kids and I were determined to enjoy it to the max.

Sweet Pea can be such a fashionista, so when she decided to don her favorite red "dress" (actually a woman's size small shirt that we bought in a fit of desperation when she needed something red to wear for her school's Red Ribbon Day) and cowboy boots, I was more than happy to oblige her request for a photo. Even though the sun was a bit to bright for great picture taking, the kids were so darn cute that "a" photo turned into around 200 photos!

She wanted to pose by the tree:


I suggested we move over to the slide:


Can't leave out the Little Dude!


Sweet Pea always wants to pose and cheese, so I was snapping surreptitiously while pushing the Little Dude on the swing:


This might be my favorite:


I was trying to shepherd them over to a particularly picturesque part of the yard, but someone would rather climb over the fence where he knows he's not supposed to go. Look at that mischevious grin!


And now for the challenge of trying to get a nice posed shot of the two of them together in the spot I liked, when I know I have about 30 seconds' worth of Little Dude patience left:


 The Little Dude is long gone, and even Sweet Pea is getting fed up with me:


 He'd climbed in the plastic swing that's tied to a tree limb.  Here he is making his sleepy face while waiting for a push:


 But he's never to sleepy to kick the ol' boots off and enjoy a wild barefoot ride in the big swing before nap time!


Picasa didn't feel like letting me edit photos tonight, so these are all straight out of the camera.  I'm really looking forward to making a few adjustments and getting some sweet frameables out of today's impromptu photo session.  If I'd actually planned it, they wouldn't have turned out nearly this good!

Wednesday, October 19, 2011

DIY Chalkpaint Part Deux: Unsanded Grout Mix

I’ve been enjoying my original batch of plaster of paris based DIY chalk paint so much that it’s taken me a lot longer than I thought it would to get around to trying other methods.Finally, last Tuesday something possessed me to attack a little table I picked up at a church rummage sale a few weeks ago. 
Why now, when I could’ve instead opted to finish one or even two of the several other projects that are near completion?
Beats the heck out of me!
Here’s the before. 

Good bones, but plenty of gooey, filthy ooook on the top.  And because the picture above really doesn't do its stomach-turning nastiness justice:  
All together now ....  Ewwwwwww!!!

I scrubbed it down with some TSP and sanded the top...easy peasy because the finish was flaking off if you so much as looked at it crossways.  I was planning to do another dark stained top and creamy painted legs combo. Apparently, that’s my default “look”.
There were a few white spots on the legs that I thought I should sand off, just in case they were something that would screw with paint adhesion, so I hit those with the sandpaper, too. 

That’s when I realized that the legs had been painted brown. Ugh, am I the only one who’d like to put out a Public Service Announcement warning the general populace of the aesthetic dangers of brown paint on furniture??  No wonder this poor little table looked so dull and lifeless!
Anyway, once the paint started coming off the legs, I kind of started loving the look of the wood underneath…especially in the spots where a little of the paint was left behind. So next thing I know, my plan has been turned on its head…instead of dark/creamy I’m thinking super-distressed white top and chippy / natural legs.
Now, y’all know I am not a measurer.  I just poured the unsanded grout into the remains of the same Valspar oops cream color that I used on my first DIY chalkpaint table, until I felt like I had reached something in the neighborhood of the recommended 2 Tbs / 1 cup ratio.  I again added a little water because this mixture was super-thick, super-lumpy, and super hard to stir. 
I loved the way it went onto my table top.  Even after adding water and stirring till my shoulder nearly dislocated, there were definitely flecks of grit, but they brushed right out.  It was like magic, so cool!  The mixture had a nice feel on the brush, and best of all the bright white grout allowed the true, rich creamy color of the paint to shine through.  My one gripe about my plaster of paris mix is that it tends to change the tone of the base paint a little – it makes it look a little cooler, probably because the plaster of paris seems to have a subtle gray tinge.
I didn’t worry about getting even coverage, since I knew I was going to be sanding a LOT of the paint back off.  I was impressed, though, with how easily the paint dry brushed, and yet how thoroughly it covered when I left my brush loaded.  Once I sanded most of the paint off the top, I waxed the whole table with Johnson’s clear followed by a sparse application of light brown Briwax on the top.  Normally I’m not a huge fan of the light brown wax because I think it usually makes pieces look dirty, rather than the antiqued look that the dark wax lends.  But in this case I think just a smidge of light brown was just right.
Part of me wants is tempted to go back and paint the legs solid white with minimal distressing.  What would you do??

Or maybe sand the legs a wee bit more?


I was pretty happy with the final look, and with the way the paint performed as well.
But then I got a little cocky with it.  I have an awful dark brown laminate storage drawer thingie I bought several years ago as an emergency solution for the overflow of toys into the dining room, and I thought that it, too, would be a good candidate to test my new DIY chalkpaint formula.  Especially since I’m not using it in the dining room anymore, haha.  After all, my plaster of paris mixture handled cheap laminate with ease, and I honestly thought by the “feel” of it that the unsanded grout would adhere even better.

Can you say WRONNNNNNNNNNNNG?
First of all, my experience was that the longer you leave the unsanded grout paint mix exposed to air, the grittier and lumpier it gets. (I painted the laminate right after I finished painting the table top.  Maybe 15-20 minutes air exposure tops??) I stirred like crazy and even added a little more water, but probably should have added more because at this point the grit simply refused to brush out.  And then woe of woes, once it was dry and I hit the grit with some 220 sandpaper, that paint peeled right up.  I sanded, recoated, and tried again a few days later and same result. 

Black & white because my camera put a yellow tint on this pic (taken at night) and I wouldn't want some silly discoloration to detract from your enjoyment of the awful lumpy grit.
Bummer, dudes.
Even though I’m disappointed with that outcome, I will still keep the grout paint in my arsenal.  For one thing, I still have about 1/3 of a quart left, and it’d have to be really awful for me to waste that much paint!  I was very happy with the way the paint performed on my raw wood table top, and I am hopeful that adding a bit more water will help with the grit. Even though technically, yes, I could also use regular old latex on raw wood, I think it dry brushed AND covered better than latex, and it definitely looked more aged than straight latex.  I’ll have to see how it does on unsanded wood, but I suspect it should be fine -- I’ll just make sure I stick to my plaster of paris mix on those rare occasions that I paint fake wood!
Up next – gesso mix, thanks to Friday’s lunchtime jaunt to the art supply place near my workplace!  Not sure what I’m going to paint, (alas, that’s what I’d intended  the Highway Telephone Stand for), although maybe I’ll try it on the awful dark brown laminate cabinet’s drawers just to see what happens …and who knows, maybe I’ll even go a little crazy and measure the gesso or something…all in the name of science, ya know!